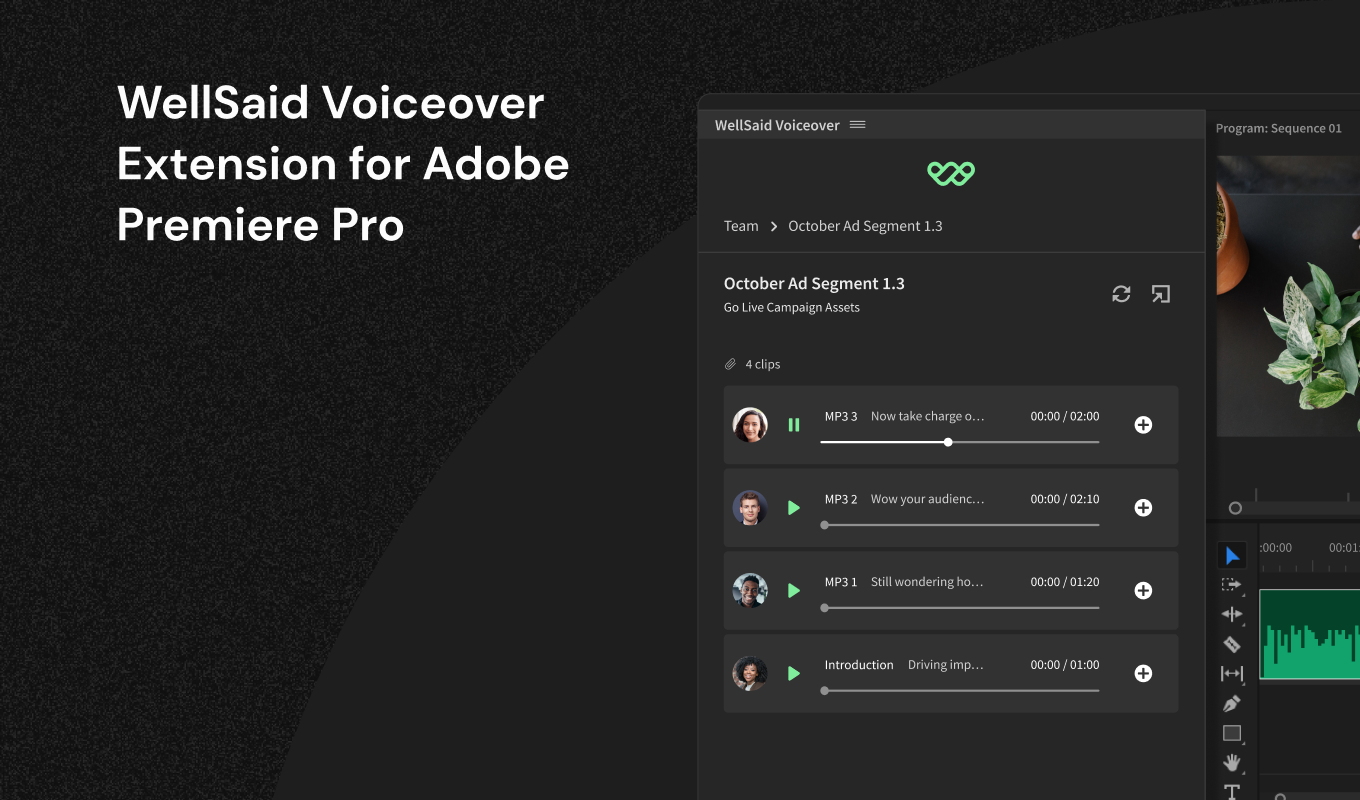
The WellSaid Voiceover extension lets Business and Enterprise customers directly access and integrate WellSaid Studio audio into Adobe Premiere Pro, streamlining production workflows. No more manual file storage, transfers, or downloads—everything stays synced and ready to use.
Installing the WellSaid Voiceover Extension
- Head to WellSaid Voiceover on Adobe Exchange and sign in with your Adobe ID.
- Click Free to acquire the extension.
- Download the Creative Cloud Desktop Application if it's not already installed.
- Once acquired, click Manage to view the plugin in Creative Cloud.
- Install the WellSaid Voiceover extension from the Creative Cloud Desktop app.
-
Close and reopen Premiere Pro if it's already running.
Setting Up the Extension
- Open Adobe Premiere Pro and start a new project or open an existing one.
- Go to Window > Extensions > WellSaid Voiceover.
- The extension opens as a standalone panel. You can dock it anywhere in your workspace.
Once installed, you'll land on the WellSaid sign-in screen. From here, you can:
- Sign up for a new account or
- Log in to your existing WellSaid account.
(Note: Full access to the extension is available on Business and Enterprise plans only.)
After signing in, you'll see your WellSaid content organized in the Projects panel.
Adding Voiceovers to Your Premiere Pro Project
- Open a WellSaid project to reveal its sections.
- Preview the audio to confirm it's the version you want.
- If the project uses sections, expand a section to view available versions as needed.
- Click the plus (+) icon next to a section to insert the audio into your active timeline. Your audio file will automatically be added.
Managing Audio Files
- In your Project, click the exit arrow button to open it in WellSaid Studio and make edits.
- After making updates or creating new audio in Studio, return to Premiere Pro and click the refresh icon to load the latest changes.
Managing Projects
- From the Projects page, click the three-dot menu to open WellSaid Studio.
- Make updates to your projects in Studio, then return to Premiere Pro and click the refresh button to view the changes.
Adjusting your Settings
File Format
The default file format is WAV for higher quality, but you can switch between MP3 and WAV based on your needs.
Download Folder
Adobe saves audio in a project folder by default, but you can choose your preferred location for downloads.
Default Cursor Location
The default is to insert audio at the cursor location, but you can choose from other options, such as:
- Beginning of the project
- Beginning of the section
- Media library